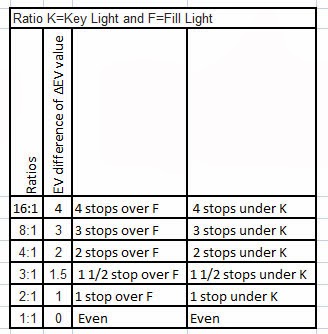
Using classic Rembrandt light (45 to side 45 up) create a portrait with key , fill 2 stops under exposed and backlight. Check the class blog under Lesson 4 to see how it should be laid out.
Using three lights invent your own formula.
Post one separate finished photograph for this one

Thursday, September 25, 2014

Lesson 4 Three Light Hollywood Portrait
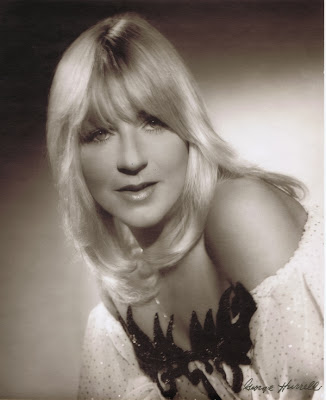
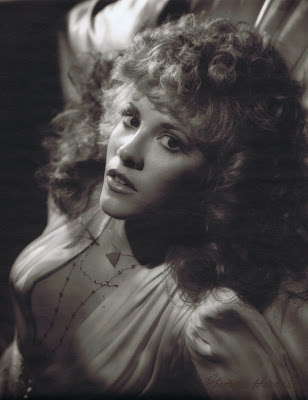
Inspirational Portraits


Hurrell's Fleetwood Mac Images from 1980

BSJTKM7B+w~~60_3.jpg)

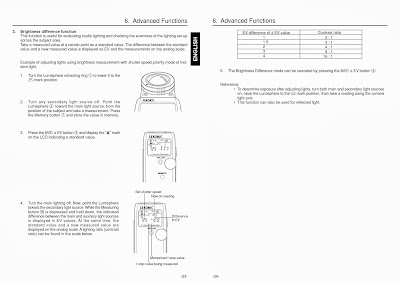
How to use the Sekonic L-358 to calculate EV difference between the key and fill light:
1. Read the Key light
2. Press the Memory Button
3. Press the ΔEV Button
4. Read the Fill light while keeping the Measuring Button Pressed


Wednesday, September 17, 2014
Assignment 3 One Light
Using the 250 watt halogen bulb in the equipment closet, make a portrait by selecting a quality and direction of light to communicate an emotion that you feel about a person. Make an additional portrait that reflects the opposite feeling you have about the person. Explain in writing the laws of light that were at work in each portrait.
Lesson 3 Direction of Light, Diffusion, Diffraction and Using One Light


One Light Portraits

Production Stills
Diffusion Demonstration



What happens when a point source (like the sun or our Halogen Bulb) falls on a solid white sphere:
1. A highlight is created
2. A cast shadow is created
3. A core is created in the transition of the highlight and the shadow
4. A cast shadow is created
5. A specular or incident highlight is created with the highlight (it is the direct reflection of the light source)

The cube is tilted to reveal 3 sides equally. When a point source (our Halogen bulb) is placed over and as close to the camera lens as possible, all three sides reflect equally. When the light is moved to the left and up, the 3 sides reflect light in unequal ways and appear as 3 differentvalues
Wednesday, September 10, 2014
Assignment 2 Demonstrate the 3 Laws of Light in One Photograph
In one photograph using one light source clearly demonstrate the 3 laws of light at work. Include the light source in the photograph. The subject is the light. Think of it as more of a physics project than a photograph. Use a dodging tool to prevent the light from flaring the lens. Try to crop out any rigging you might use and make the image about the light.
Tuesday, September 9, 2014
Lesson 2 Light Travels in a Straight Line
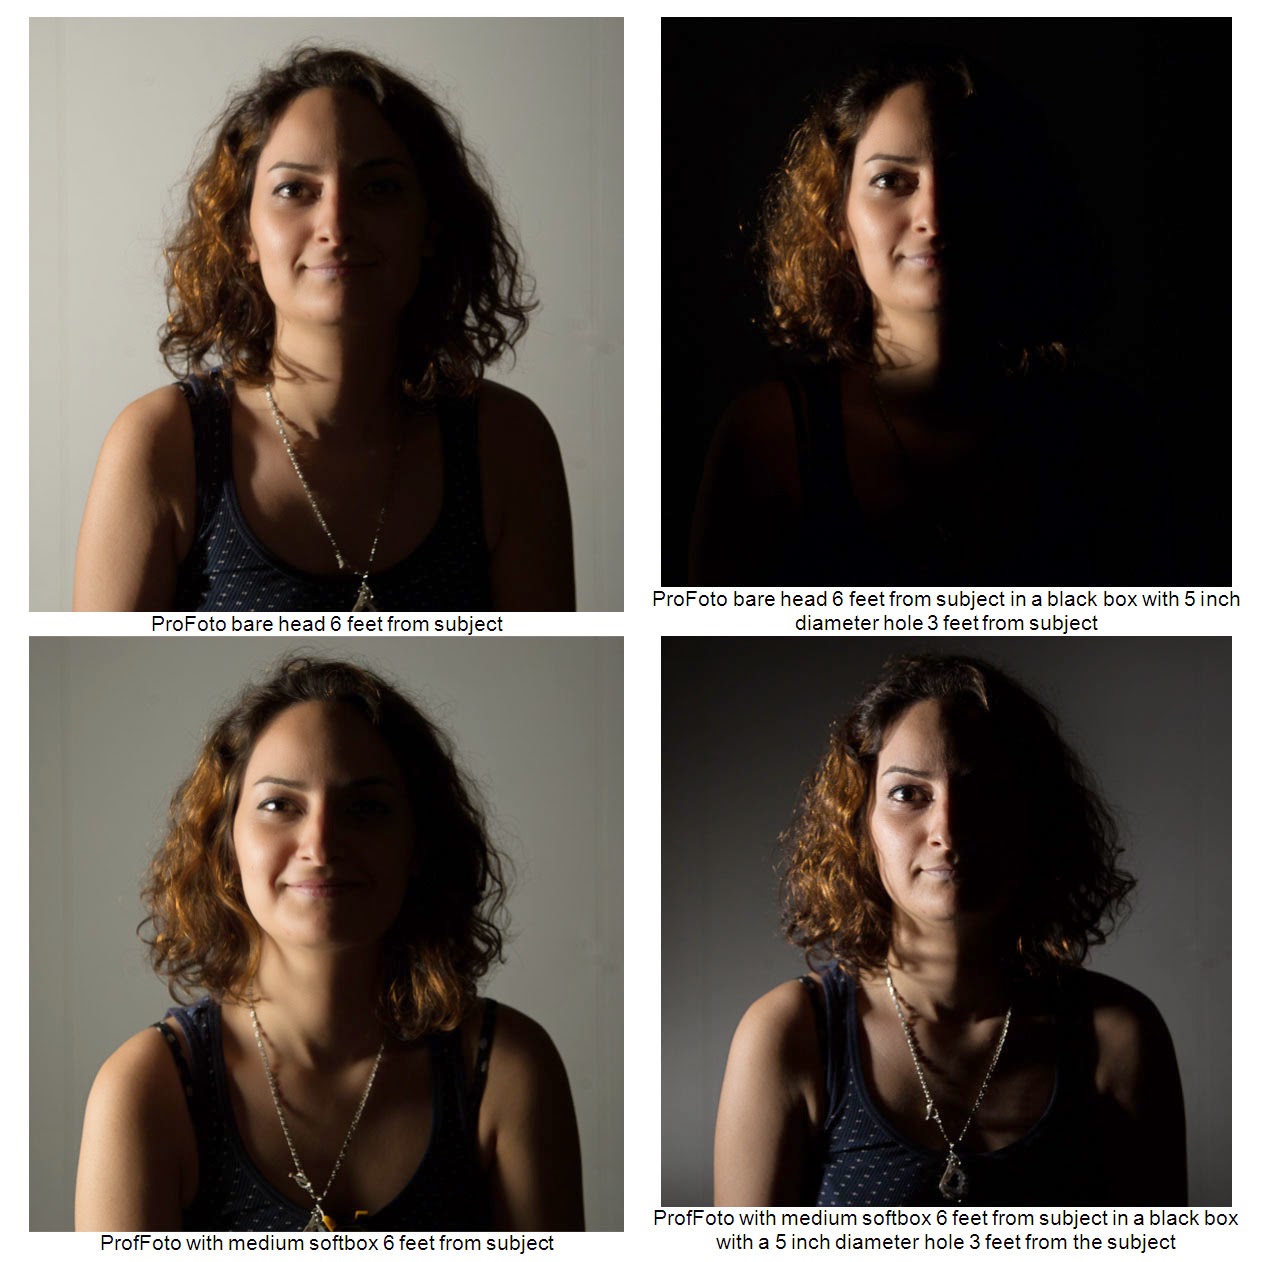


Abelardo Morrell Photograph

Diagram of the Medium softbox being projected through the 5 inch diameter hole.

The camera obscura is an example of light traveling in a straight line

Lesson 2 Angle of Incidence Equal Angle of Reflection


Light reflected from a metal surface with angle of incidence equal to the angle of reflection. The dashed line is perpendicular to the surface.

Light reflection from a) smooth surface (specular reflection) and b) rough surface (diffuse reflection). In both cases the angle of incidence equals the angle of reflection at the point that the light ray strikes the surface.


How a Parabolic Reflector works.
World War II Search Light
Subscribe to:
Posts (Atom)